Getting Started
Open IoT Software platform (OISP) is an open source framework for IoT services that runs on Kubernetes. OISP provides:
- IoT Device onboarding
- Role based access management for users with Keycloak
- Metrics collection in a Cassandra cluster
- Sending Control Commands back to Devices
- Multi-Tenant isolation
- Rule Engine to trigger Alerts based on metrics conditions
- Apache Flink/Apacahe Beam based service management to enable at-least-once and exactly-once guarantees
- Alerts which can be sent by email, device commands or http triggers
- REST API to manage different Tenants, Users, Devices, Rules, Alerts
- MQTT/Websockets/REST services to connect Devices
- High availability of services
- Scalable design to support several hunderts to many thousand devices
- Kubernetes only design - can be deployed on every Kubernetes cluster
Note
Most of the functionality described in this documentation is packed into the Makefile in the project root. Run make help for a list of available commands with descriptions.
Build local platform based on git tags
A local platform is mainly meant for functional testing, it is therefore not providing any high availability and should not be used for production deployments.
It can be built and deployed independently of whether you have dockerhub access to OISP repository.
In the following, we describe the build, deploy, and test of v2.0.4-beta.3 version on Ubuntu 20.04 LTS
sudo apt install net-tools git make
git clone https://github.com/Open-IoT-Service-Platform/platform-launcher.git

cd platform-launcher/
git checkout v2.2-beta.2
cd util/
sudo bash ./setup-ubuntu20.04.sh
sudo chown -R $USER ~/.config ~/k3s ~/.cache
sudo usermod  -aG docker $USER
After that one has to logout and login to make sure the docker group assignment becomes active. After login, move again to the
diretory is platform-launcher
git submodule update --init --recursive
export NODOCKERLOGIN=true

DEBUG=true  DOCKER_TAG=v2.2-beta.2 make build
DEBUG=true make DOCKER_TAG=v2.2-beta.2 import-images
DEBUG=true make DOCKER_TAG=v2.2-beta.2 USE_LOCAL_REGISTRY=true deploy-oisp-test
make test
Access and login to local platform
To access and test the local version, we recommend to use kubefwd a tool that forwards all Kubernetes services of a namespace to the local system.
sudo KUBECONFIG=~/.kube/config kubefwd -n oisp svc
After kubefwd forwarded all services, the platform can be accessed with a browser and the url http://frontend:4001.
However, at this point it time, there is no valid user in the database. So you need to create a test user.
To login and create your first tenant (account), you have to create an initial admin user. To create the first user, there is a tool in the frontend container:
# find the name of the frontend pod, e.g. by
FRONTEND_POD=$(kubectl -n oisp get pods| grep frontend| cut -f 1 -d " ")
# execute initial creation command in frontend pod
kubectl -n oisp exec -i $FRONTEND_POD -c frontend -- node /app/admin addUser test@test.com test
Note
The creation of a test user can be simplified by using a prepared make target, as described in Section Using OISP
Then login to the platform with the user:
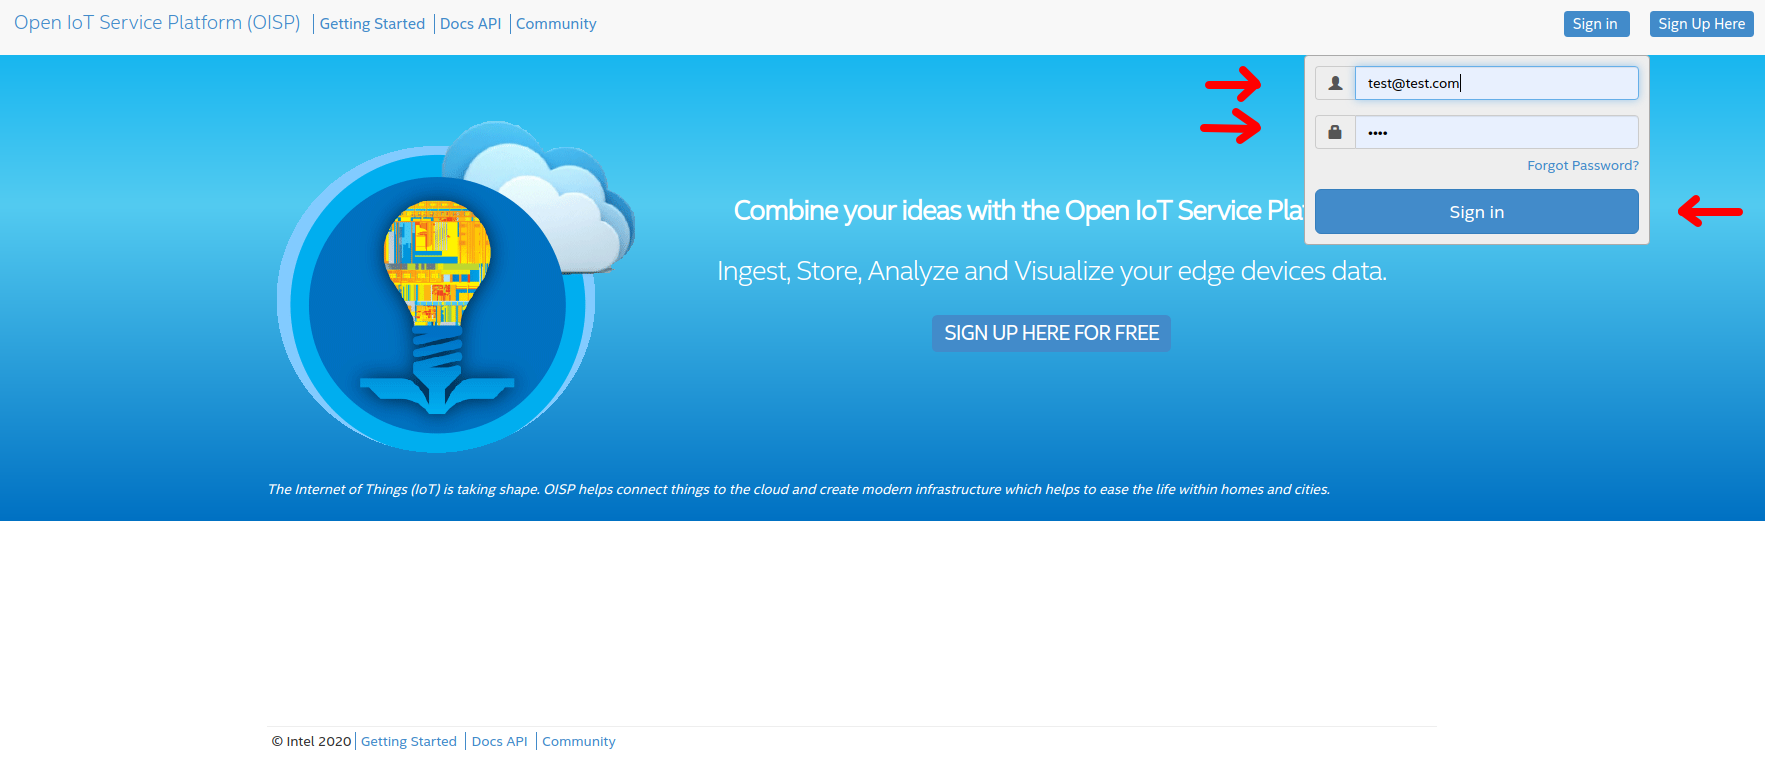
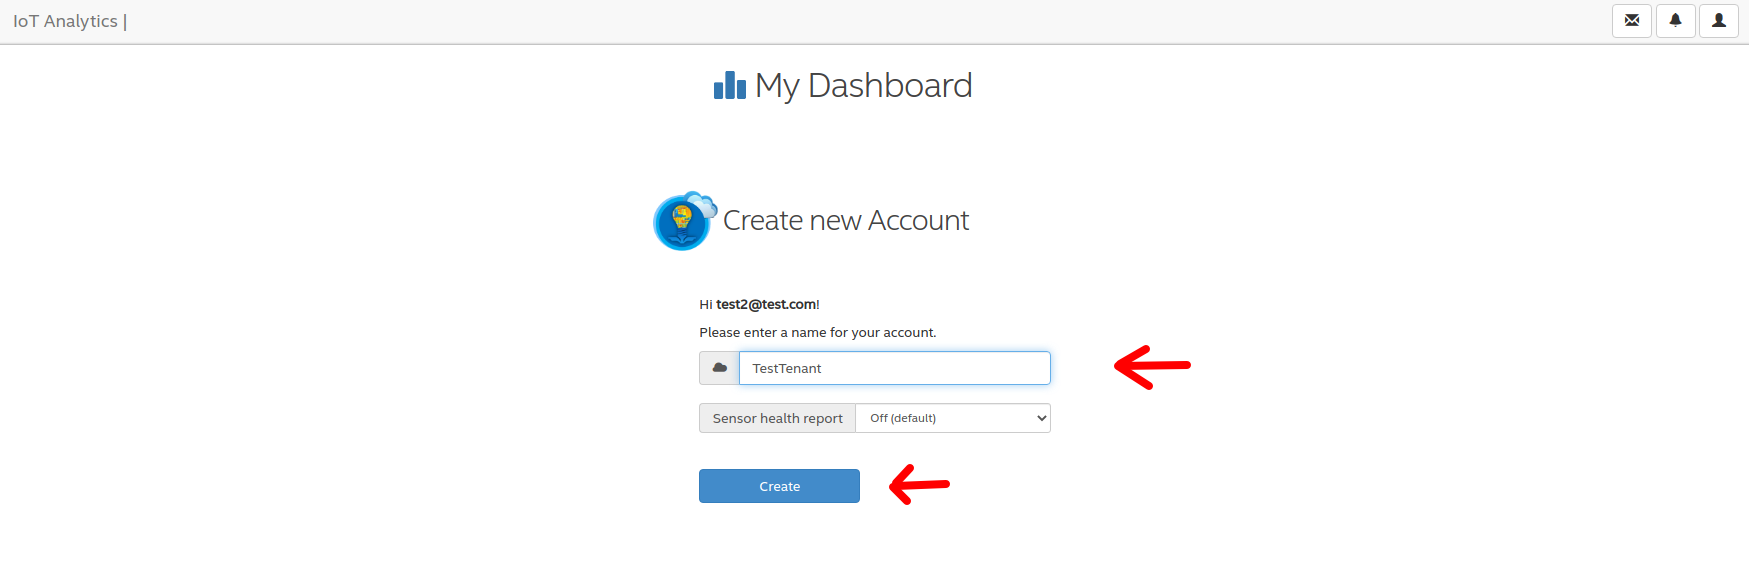
Since the user is not assigned to a tenant (account), you will asked to define your own at your first login:
Onboard your first device
Now we are showing how to onboard a device to the framework. First, we need the OISP-Agent, which is the part which runs on the device. One agent is typcially
responsible for one device.
We assume that a local oisp system has been setup and kubefwd is used to forward the kubernetes services as described in Section Access and login to local platform
First, checkout the repository:
git clone https://github.com/Open-IoT-Service-Platform/oisp-iot-agent.git
cd oisp-iot-agent
npm install
Then configure the agent for your local OISP instance:
cat << EOF > config/config.json
{
  "data_directory": "./data",
  "listeners": {
    "rest_port": 8000,
    "udp_port": 41234,
    "tcp_port": 7070
  },
  "receivers": {
    "udp_port": 41235,
    "udp_address": "0.0.0.0"
  },
  "logger": {
    "level": "info",
    "path": "/tmp/",
    "max_size": 134217728
  },
  "default_connector": "rest+ws",
  "connector": {
    "rest": {
      "host": "frontend",
      "port": 4001,
      "protocol": "http",
      "strictSSL": false,
      "timeout": 30000,
      "proxy": {
        "host": false,
        "port": false
      }
    },
    "ws": {
      "host": "websocket-server",
      "port": 5000,
      "minRetryTime": 2500,
      "maxRetryTime": 600000,
      "testTimeout": 40000,
      "pingPongIntervalMs": 30000,
      "enablePingPong": true,
      "secure": false,
      "proxy": {
        "host": false,
        "port": false
      }
    },
    "mqtt": {
      "host": "mqtt-server",
      "port": 8883,
      "qos": 1,
      "retain": false,
      "secure": true,
      "strictSSL": false,
      "retries": 5
    }
  }
}
EOF
In order to verify whether the agent finds the local OISP service, execute the following command:
./oisp-admin.js test
If all was configured right, the output should look like
info: Cloud Proxy created with Cloud Handler: rest
info: Mqtt proxy found! Configuring MQTT for data sending.
info: No credentials found for MQTT. Disable MQTT test
info: Trying to connect to host with REST...
info: Response:  {"kind":"healthcheck","isHealthy":true,"currentSetting":"local","name":"dashboard","build":"0.15.0","revision":"unknown","date":"2015-08-26T10:38:38.773Z","items":[]}
info: Connected to frontend
info: Environment: local
info: Build: 0.15.0
info: Trying to connect to WS server ...
info: Connection to Web Socket Server successful
info: Websocket connection closed. Reason: 1000 Normal connection closure
Then, define the device
./oisp-admin.js initialize
./oisp-admin.js set-device-name testdevice
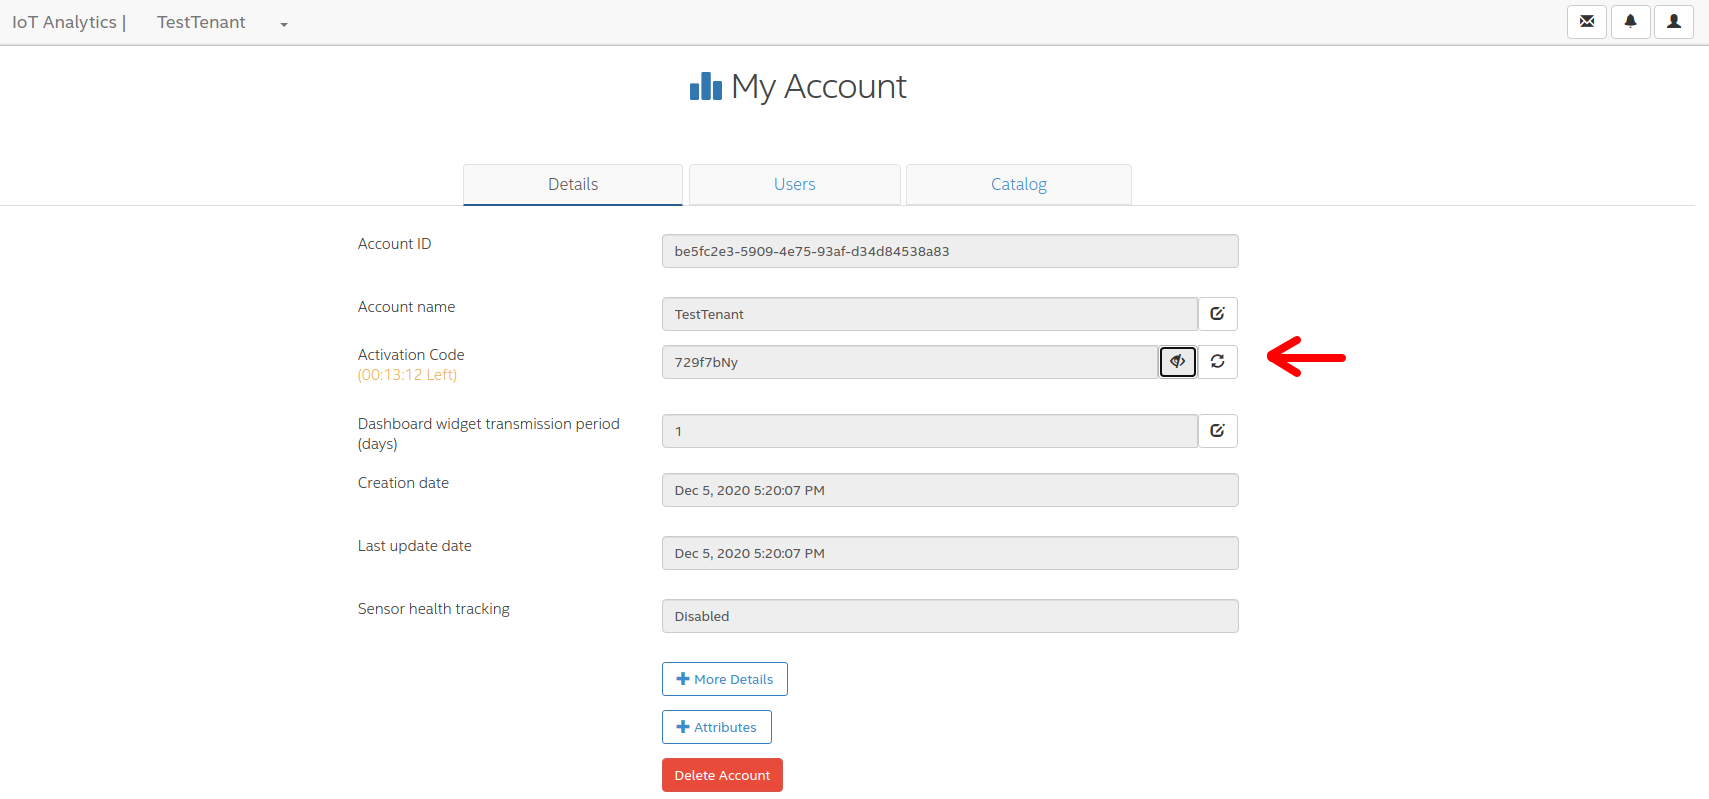
To onboard the device to the platform, you need to get the activation code from the dashboard. Click on the TestTenant you defined in Section Access and login to local platform to see the tenant (account) details. Get the current activation code. In case there is no valid code any longer (it is only valide for 1h) then refresh it.
Then, with the activation code, add your device to the platform:
./oisp-admin.js activate xxxxxxxx
Note
The activation code is randomly generated by the dashboard and is valid 1h to onboard devices to your tenant. Use the actual code from your platform and replace the xxxxxxxx in the command above
Now add a metric to your device:
./oisp-admin.js register temp temperature.v1.0
Note
The catalogue types temperature.v1.0 and humidity.v1.0 are default catalogue items and available on every platfrom. You can add your own metric and actuator type in the dashboard.
Finally, send some test metrics to the platform:
./oisp-admin.js observation temp 20.5
./oisp-admin.js observation temp 22.0
./oisp-admin.js observation temp 21.0
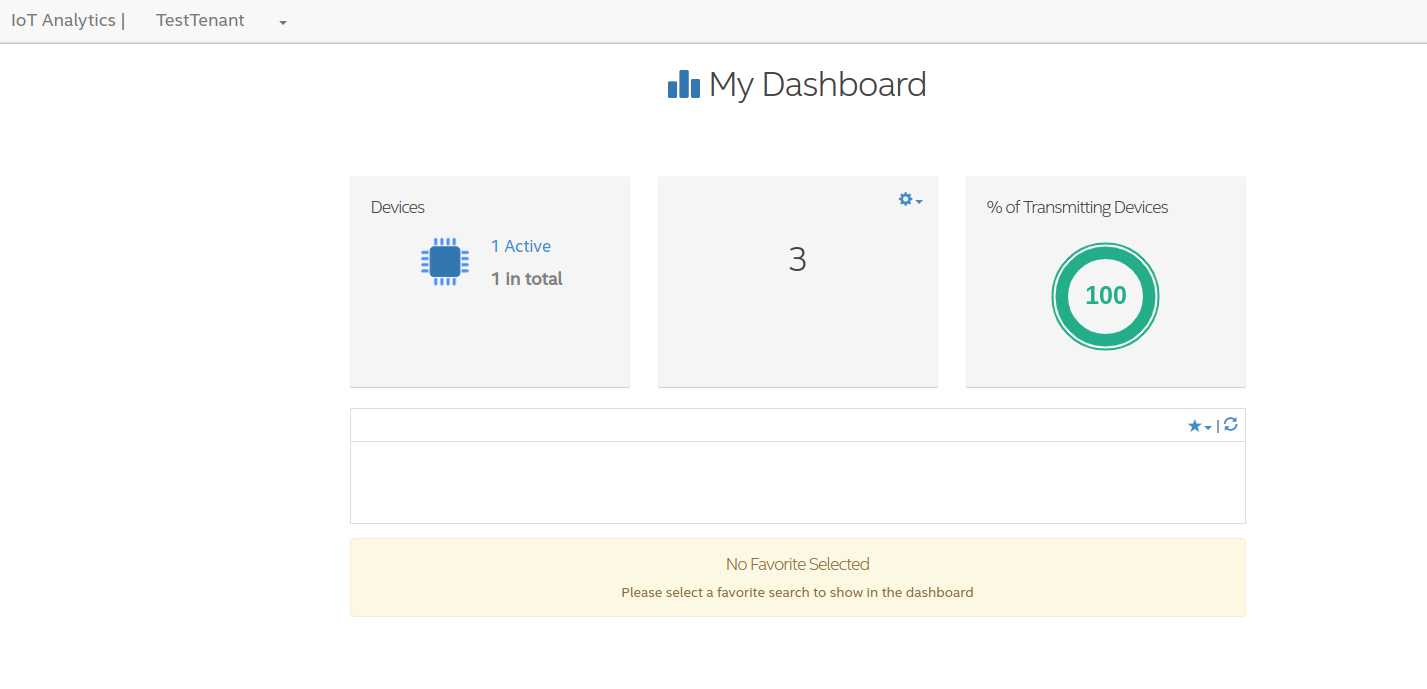
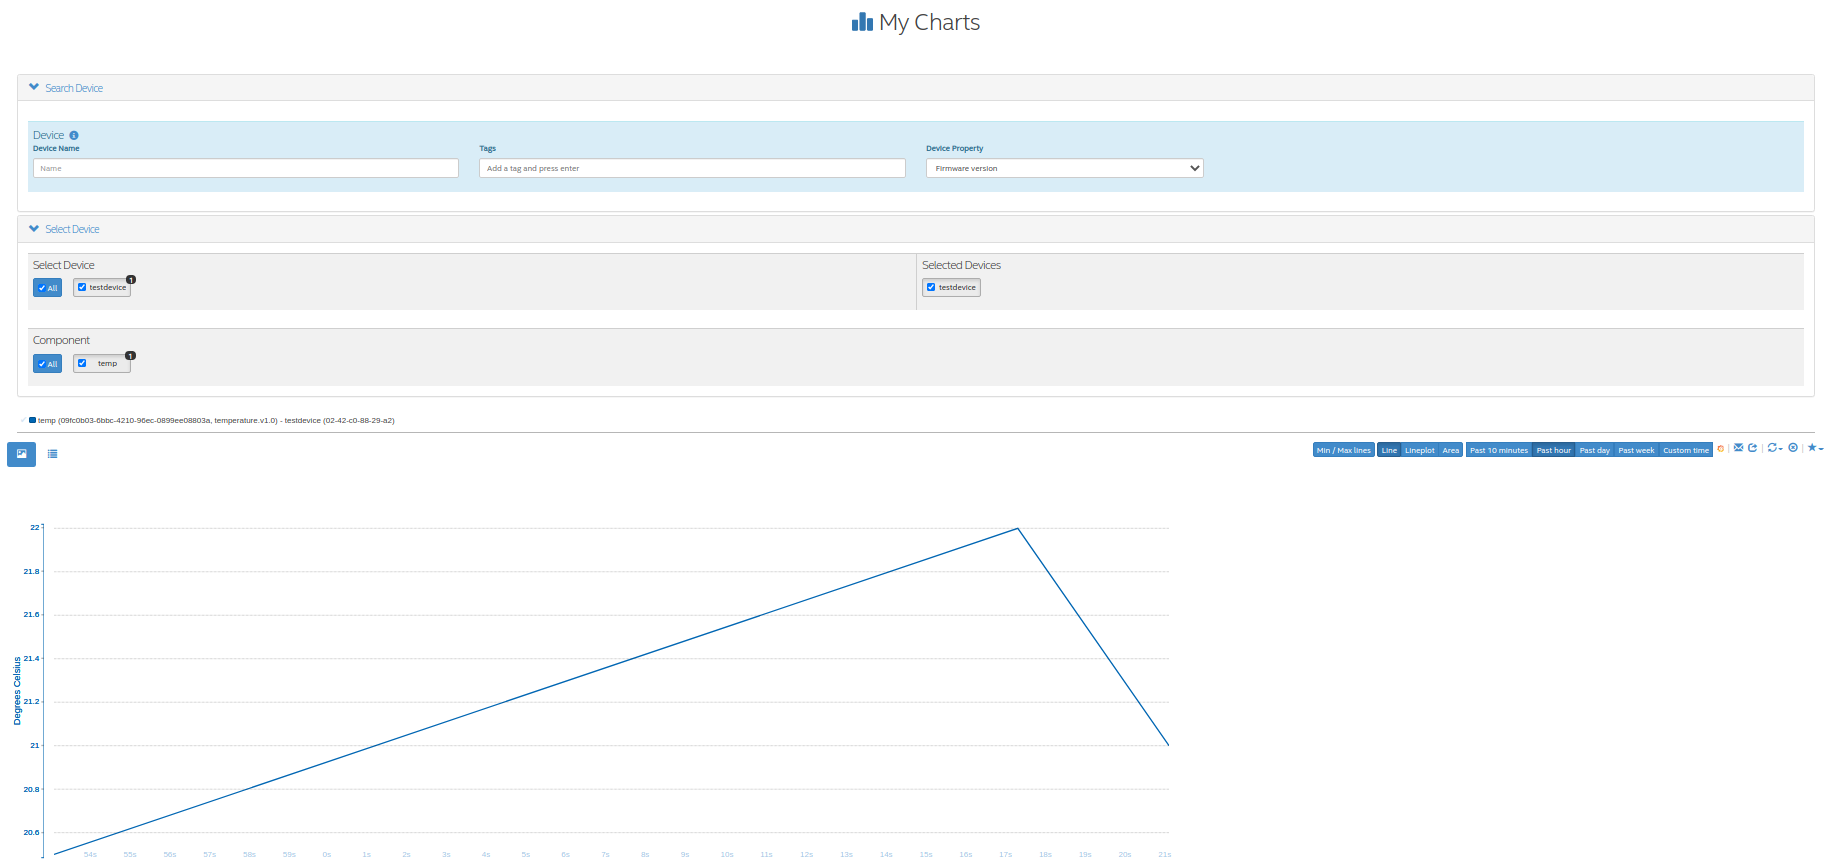
And watch it on the dashboard
and see the metrics on the charts:
For more details on the agent, please consult https://github.com/Open-IoT-Service-Platform/oisp-iot-agent.
Deploying OISP
OISP can be deployed on any Kubernetes cluster with a volume provisioner and an ingress controller. For development purposes, we recommend a local installation based on k3s, as described in Creating a lightweight local kubernetes cluster.
If you wish to deploy on an external cluster, make sure the following conditions are met:
- Your host is configured to manage the cluster, meaning the default kubeconfig file is at
~/.kube/config. - Helm and kubectl are installed on the client and cluster.
- The cluster has an Ingress controller and a volume provisioner configured.
Creating a lightweight local kubernetes cluster
Run the following commands from the repository root to create a local k3s cluster on an Ubuntu 20.04 host:
cd util
sudo apt install net-tools
sudo bash setup-ubuntu-20.04.sh
Note
The script should also run on Ubuntu 16.04 LTS and 18.04 LTS, but you might need to export PATH=$PATH:/snap/bin first. On other Linux distributions, please install the snap packages in the script manually, and run the script afterwards.
The cluster is created in two Docker containers, one for the master and one for the worker. If you like, you can modify the script to make k3s run on bare metal instead of Docker, but the containerized setup is recommended, to avoid issues like port clashes.
If you need to recreate the cluster, simply run make restart-cluster.
Warning
Both scripts are going to replace your ~/.kube/kubeconfig file!
Local Deployment
If you have access to the OISP dockerhub repository, export your user credentials to your shell:
export DOCKERUSER=[YOURUSERNAME]
read -s DOCKERPASS # type your password and press enter
export DOCKERPASS
Otherwise, you will have to build the images yourself as shown in Section Build local platform based on git tags.
You can specify a docker tag for the images being built. Run make help for more details. Afterwards, you have two options to get the images inside the cluster:
- Run
make import-images, which also takes theDOCKER_TAGandDEBUGparameter, of which the later has to be set totruein order to run tests. - OR push the images to another repo, and adapt the
imageCredentialssection inkubernetes/values.yaml. You will also need to export your credentials to your shell as described before.
There are couple of operators that OISP depends on. They can be installed buy running the script util/deploy_operators.sh.
Finally, adapt the kubernetes/values.yaml to fit your needs and run make deploy-oisp.
Note
If you wish to run tests, or have a debugger container inside the cluster with useful tools, run make deploy-oisp-test, which requires you to also build with make build DEBUG=true from the repository root.
Hint
You can watch the deployment process by running watch kubectl -n oisp get pods, or programmatically wait until the system is up and running by using the command make wait-until-ready.
Cloud Deployment
In the following it is assumed that the OISP images are provided in a docker registry.
First install helm with MQTT TCP Service:
helm install ingress-nginx ingress-nginx/ingress-nginx --set tcp.8883="emqx-headless:8883" -n ingress-nginx
Make sure that you have registered a for this external IP, e.g. mydomain.org. This is important for the cert-manager later to get the certificate and to bring up the whole platform. Without a properly mapping of domainname to external IP, the platform will not come up properly.
To install,
create an install script deploy.sh with your email and hostname:
export NAMESPACE=oisp
export DOCKER_TAG=v2.2-beta.2
export HELM_ARGS="--set less_resources=\"false\" \
                  --set production=\"true\" \
                  --set certmanager.email=\"<my-email>\" \
                  --set hosts.frontend=\"<domain-name as defined above>\""
make deploy-oisp
Then configure your docker-credentials and execute the script:
export DOCKERUSER=<user>
read -s DOCKERPASS
export DOCKERPASS
bash ./deploy.sh
Running end to end tests
If you have deployed with make deploy-oisp-test, you can run make test to make sure everything is working. The tests should take about 3-4 minutes to complete, after the system is up and running.
Using OISP
You need a user account to interact with most of the API functionality. You can create a test user by running make add-test-user. The username is user1@example.com and the password is simply password.
Exposing OISP locally without ingresses
In a production environment, OISP should be exposed using Kubernetes ingresses. However, you might want to skip the configuration for local development purposes. It might also be useful to expose services which are not otherwise publicly accessible. You achieve this using kubefwd.
sudo kubefwd services -n oisp --kubeconfig=/home/[YOUR_USERNAME]/.kube/config
Interacting with OISP
You can interact with OISP using the REST API, or with our SDKs for javascript and python.
Warning
Using the SDKs is the recommended way of interacting with the platform, however, they might not be always up to date with the latest features. Please feel welcome to open issues for any incompatibility problems between the API and the SDKs.
Deploying IoT-Agent with test sensor
In Onboard your first device we have shown an example how to onboard a device directly on the host system. But if you want to do the device onboarding containerized we provide a description below.
The folder ./kubernetes/iot-agent contains an example on how to deploy the oisp-iot-agent
with Kubernetes. Once there is a running OISP instance, you can create a test user and deploy the agent by
- Run
make add-test-userto create a user in OISP. - Create or pull containers oisp-testsensor and oisp-iot-agent.
- Import agent images
make import-images-agentto import the images to k3s. - Login with the user to the OISP service, create an account and take the activation code from the account main page.
- Copy the activation code to
./kubernetes/iot-agent/global-config/activation-code - Update the urls in
./kubernetes/iot-agent/global-config/config.json - Create the global configmap and secrets by
(cd ./kubernetes/iot-agent/global-config; sh ./create.sh - Go to the testsensor directory
cd ./kubernetes/iot-agent/deploy-testsensor - To create instance
non nodenodeapply the script as followssh ./create node n - Apply the instance with
kubectl apply -f node-n/all.yaml
Cert-Manager
OISP installs and configures Cert-Managger. No separate deployment is needed any longer
Updating Keycloak Realm Keys
Using Keycloak adapters, OISP supports automatic key rotation for token signing. Keys can be managed in Keycloak at ‘Realm Settings -> Keys’. Active keys can be marked as passive, by clicking the specific key under the ‘Active’ section. Passive keys are still valid, but they will no longer be used for signing new tokens. Passive keys can also be re-activated using the ‘Passive’ section. You can also disable keys. Disabled keys are still stored in Keycloak, but they are not used/valid. In the ‘Providers’ tab you can add new keys or completely delete old ones. To test automatic key rotation, try:
- Log in with a test account
- Mark all current RSA Keys as passive
- Generate a new RSA Key and make it active
- Try to log in with a new account, you should see that it uses the new key
- Try using the token of old account, it should still be valid
- Disable all the passive keys
- Soon enough, the token of the old account should be rejected by OISP. This does not happen immediately, because tokens are by default cached for 10 minutes. You can change this time by adjusting the corresponding keycloak config in the corresponding oisp service (i.e. frontend, mqtt-gateway). Refer to Keycloak Node.js Adapter Documentation for configuration details.
Note
For token signing, we are talking about RSA keys. By default Keycloak also has other keys generated with different algorithms(i.e. for password signing).
Note
In theory, Keycloak also supports editing keys through the Admin REST API. However, this is currently not documented on the Keycloak Documentation. In the future we are planning to create automatic tests for the key rotation, so that you can also refer to.